The Todo Noise Application
In this tutorial we will build a simple distributed audio application, which illustrates the most common type of distributed interaction you will need to implement in your own applications: i.e. remote monitoring and control.
The tutorial requires basic knowledge of the soundworks state manager and of the platform-init plugin, so please refer to the relevant tutorials if you didn't check them yet.
Along the way, we will discover how to create our own reusable Web Components using the Lit library proposed by default in soundworks applications.
The final source code of this tutorial can be found here
Relevant documentation
User Story
The application purposely privileges the point of view of a user in a working situation (e.g. developer, designer, composer or performer) rather than the point of view of the end user (e.g. participant, audience). Indeed, while the later is most of the time very specific to the application or artwork, the former generally requires some properties and features that are relatively common. To illustrate these two roles, the application is composed of two different types of clients: the player and the controller.
The player can be envisioned as the client dedicated to the end users. The application can accept any number of players and each player has access to the following functionalities:
- It can trigger a sound.
- It can start and stop a synthesizer.
- It can update a parameter (i.e. the frequency of the synths).
The controller is dedicated to the user in working situation, be it during the development or creation of the artwork, as well as its performance. The application can accept any number of controllers and each of them has access to the following functionalities:
- It controls global parameters of the application (i.e. mute, master volume). These global parameters must be synchronized among all the clients of the application (i.e. player and controller).
- It can take full control over any player, i.e. the change the volume, trigger a sound and change the state of the synthesizer as if it was the client itself.
This minimal set of functionalities should provide a good overview of several important and recurring patterns at stake in real-time distributed audio applications.
Scaffolding the application
First thing first, let's generate a new empty application with the @soundworks/create wizard:
cd /path/to/working/directory
npx @soundworks/create@latest todo-noise
You can already select the @soundworks/plugin-platform-init plugin to have it installed.
# Install plugins
? Select the plugins you would like to install/uninstall › - Space to select. Return to submit
◉   @soundworks/plugin-platform-init
◯   @soundworks/plugin-sync
◯   @soundworks/plugin-filesystem
◯   @soundworks/plugin-scripting
◯   @soundworks/plugin-checkin
◯   @soundworks/plugin-position
◯   @soundworks/plugin-logger
And the @ircam/sc-components library:
# Install libraries
? Select the libraries you would like to install/uninstall › - Space to select. Return to submit
◉   @ircam/sc-components
◯   @ircam/sc-scheduling
◯   @ircam/sc-utils
◯   node-web-audio-api
Then, when the wizard asks you for the name of the default client, just call it player, and select the browser target as well as the default template:
# Create client
✔ Name of your new client (lowercase, no-space): … player
✔ Which runtime for your client? › browser
✔ Which template would you like to use? › default

- Creating client "player" in file "src/clients/player.js"
- name: player
- runtime: browser
- template: default
- default: true

? Confirm? › no / yes
Once done, do not exit the wizard, but let's rather create our second controller client right now:
? What do you want to do? › - Use arrow-keys. Return to submit.
❯   create a new soundworks client
    install / uninstall soundworks plugins
    install / uninstall related libs
    find documentation about plugins and libs
    get config information about you application
    create a new environment config file
    eject the launcher and default init views
    check and update your dependencies
    upgrade config files from JSON to YAML
    → exit
This time let's thus call the client controller, select the browser target and the controller template. Select no, the default value, when the tool asks if the client should be used as default:
# Create client
✔ Name of your new client (lowercase, no-space): … controller
✔ Which runtime for your client? › browser
✔ Which template would you like to use? › controller
✔ Use this client as default? … no / yes

- Creating client "controller" in file "src/clients/controller.js"
- name: controller
- runtime: browser
- template: controller
- default: false

? Confirm? › no / yes
TIP
Selecting a client as default means the client will be accessible at the root of the domain, which is for example more simple if you need to share an URL with the public. In the other case the name of the client will be used as the route to access it.
For example, in our application:
- the player client will be accessible at
http://my-domain.com - the controller client will be accessible at
http://my-domain.com/controller
Once done, you can exit the command-line devtool by typing Ctrl+C or by selecting the → exit entry option.
Now that our project is scaffolded, let's create the schemas describing the states for each player and for the global parameters.
Creating and using the shared global state
To implement the user story defined above, the application will rely on 2 different classes of shared states:
- One shared state class defining global variables of the application (e.g. mute, master volume) which will be unique and shared by every connected clients.
- One shared state that is tied to each connected player, i.e. each player client will create its own shared state instance from this schema.
Let's start by defining and creating the global schema. Create a new file named global-state-description.js in the src directory, and fill it with the following code:
// src/global-state-description.js
export default {
  master: {
    type: 'float',
    default: 1,
    min: 0,
    max: 1,
  },
  mute: {
    type: 'boolean',
    default: false,
  },
};
The global state derived from this description will keep track of the master volume applied to all connected player clients (i.e. a gain between 0 and 1), and whether they are muted or not.
Once done, let's instantiate the shared global state on the server and attach all clients (i.e. players and controllers to it).
Create the shared instance
First let's create the shared instance on the server:
- Import the shared state description in
src/server.js:
// src/server.js
import { Server } from '@soundworks/core/server.js';
import { loadConfig, configureHttpRouter } from '@soundworks/helpers/server.js';

import globalStateDescription from './global-state-description.js'; - Define the shared state class within the state manager and create the
globalshared state instance:
// src/server.js
const server = new Server(config);
configureHttpRouter(server);
// define the global shared state class
server.stateManager.defineClass('global', globalStateDescription);

await server.start();
// create the shared global state instance
const global = await server.stateManager.create('global');
console.log(global.getValues());
Let's now start our server using npm run dev, you should see the current default values of the state logged in the terminal:
--------------------------------------------------------
- launching "todo-noise" in "default" environment
- [pid: 62628]
--------------------------------------------------------

+ configured clients and routing

ROLE         | RUNTIME | PATH        | DEFAULT |  AUTH
> player     | browser | /           |    x    |
> controller | browser | /controller |         |

+ starting registered plugins
+ http server listening on
    http://127.0.0.1:8000

> press "Ctrl + C" to exit
{ master: 1, mute: false }
Attaching the global state to the player clients
Let's now attach all our player clients to the global shared state. For now, we will only display its current values on the screen and will keep the actual audio code for later.
To attach to the global state, write the following snippet in the src/clients/player.js file:
// src/clients/player.js
await client.start();
// attach to the global state
const global = await client.stateManager.attach('global');
Then, modify the renderApp function provided by the template to log the current values of the global shared state:
// src/clients/player.js
await client.start();
const global = await client.stateManager.attach('global');

function renderApp() {
  render(html`
    <div class="simple-layout">
      <p>Hello ${client.config.app.name}!</p> // [!code --]
      <h1>Global</h1> // [!code ++]
      <p>Master: ${global.get('master')}</p> // [!code ++]
      <p>Mute: ${global.get('mute')}</p> // [!code ++]

      <sw-credits .infos="${client.config.app}"></sw-credits>
    </div>
  `, $container);
}
Finally, register a callback function to the onUpdate method of the global state to refresh our screen each time the state is updated:
// src/clients/player.js
function renderApp() {
  // ...
}

global.onUpdate(() => renderApp(), true);
renderApp();
Note that the true flag passed as second parameter of the onUpdate method means that the given callback will be executed immediately at registration. This allows us to remove the last renderApp() line as we know the it will be immediately executed at the startup of the application.
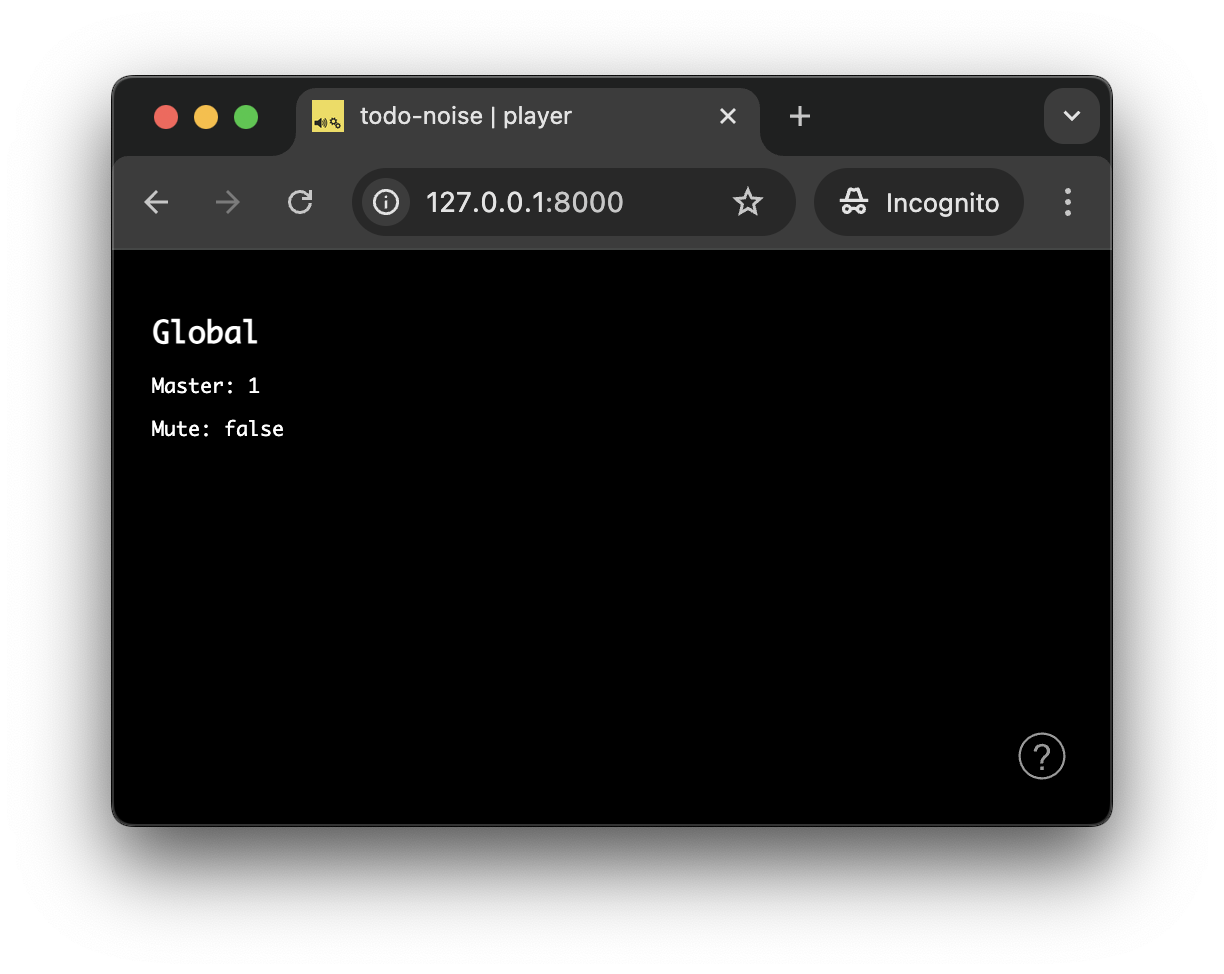
If you open a player client at http://127.0.0.1:8000 you should now see the following:
Controlling the global shared state from the controller clients
Now that everything is setup on the player side, let's implement our controller client to be able to control the global state on all connected clients.
Similarly to what we did with the player clients, let's open the src/clients/controller.js to:
- attach to the
globalstate the same way we did for players, - make sure the application screen is refreshed when the
globalstate is updated
// src/clients/controller.js
await client.start();

const global = await client.stateManager.attach('global');

function renderApp() {
  // ...
}

global.onUpdate(() => renderApp(), true);
renderApp();
To create the interface, we will again use some Web Components provided by the @ircam/sc-components library we installed when scaffolding the application.
Let's first import the components we need (i.e. text, slider and toggle) into our controller's src/clients/controller.js file:
// src/clients/controller.js
import { html, render } from 'lit';

import '@ircam/sc-components/sc-text.js';
import '@ircam/sc-components/sc-slider.js';
import '@ircam/sc-components/sc-toggle.js';
Then, let's modify the renderApp function by adding components to out layout to control the global shared state:
// src/clients/controller.js
const global = await client.stateManager.attach('global');
function renderApp() {
render(html`
<div class="controller-layout">
<header>
<h1>${client.config.app.name} | ${client.role}</h1>
<sw-audit .client="${client}"></sw-audit>
</header>
<section>
<p>Hello ${client.config.app.name}!</p> // [!code --]
<h1>Global</h1> // [!code ++]
<div style="padding-bottom: 4px"> // [!code ++]
<sc-text>master</sc-text> // [!code ++]
<sc-slider // [!code ++]
min=${global.getDescription('master').min}
max=${global.getDescription('master').max}
value=${global.get('master')}
@input=${e => global.set('master', e.detail.value)}
></sc-slider> // [!code ++]
</div> // [!code ++]
<div style="padding-bottom: 4px"> // [!code ++]
<sc-text>mute</sc-text> // [!code ++]
<sc-toggle // [!code ++]
?active=${global.get('mute')}
@change=${e => global.set('mute', e.detail.value)}
></sc-toggle> // [!code ++]
</div> // [!code ++]
</section>
</div>
`, $container);
}
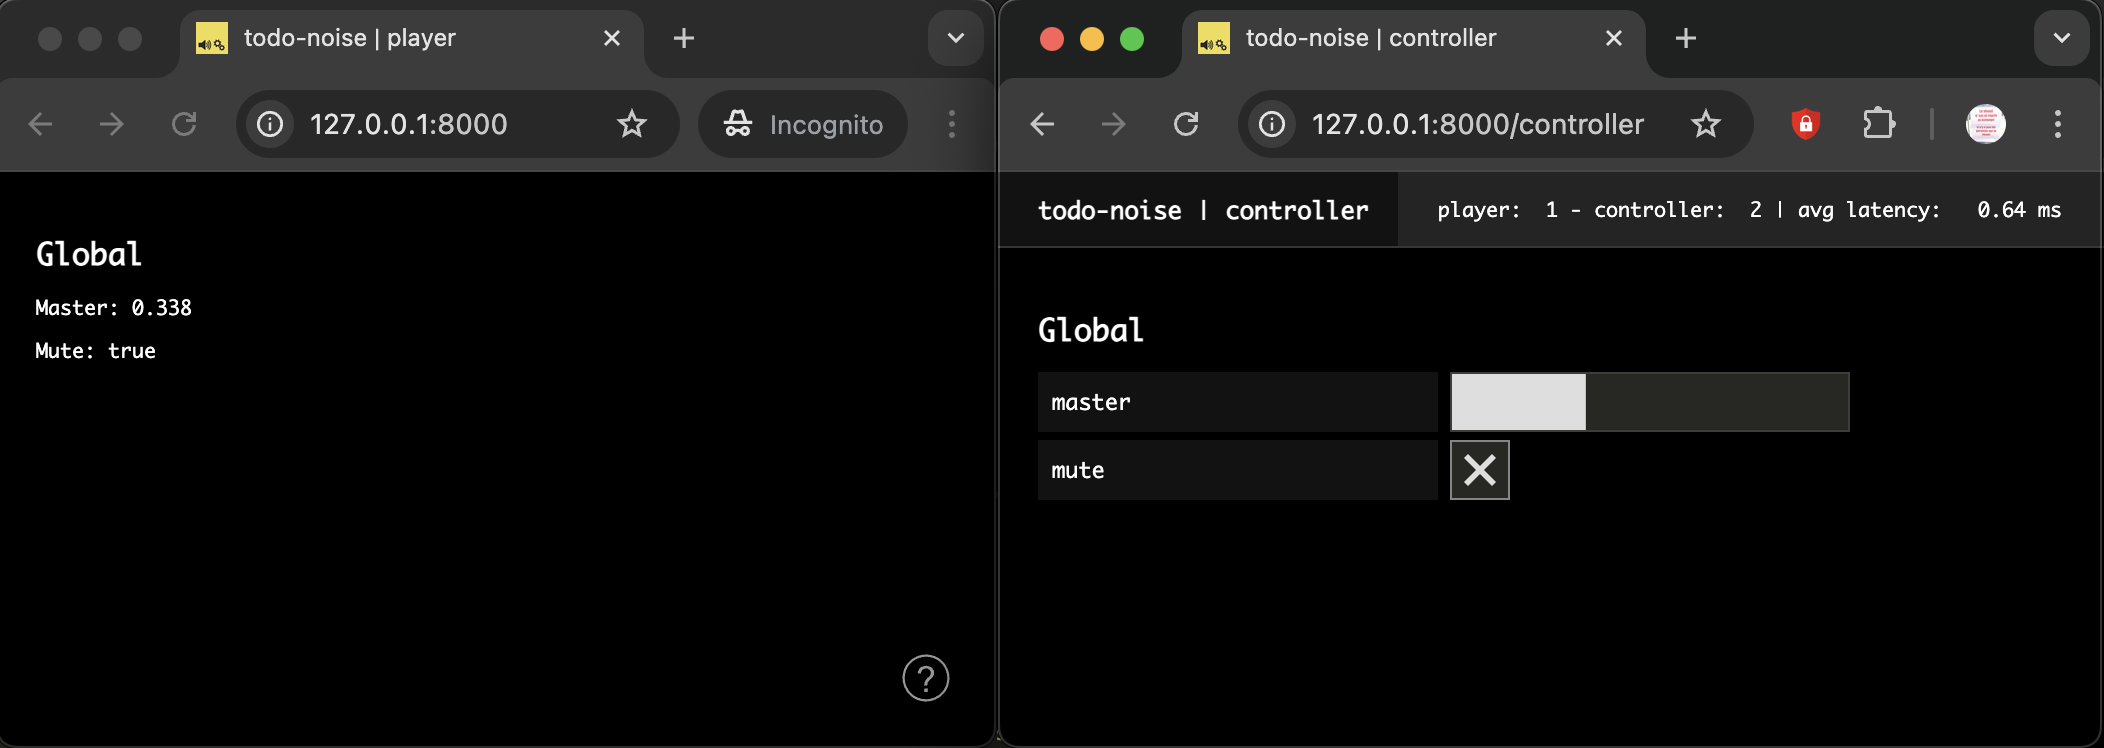
global.onUpdate(() => renderApp(), true);Now, if you open a player (http://127.0.0.1:8000) and a controller (http://127.0.0.1:8000/controller) in two different windows side by side, you should be able to remote control the player from the controller:
Creating and using the player shared states
As defined in our user story, we want the player clients to have some controls on their own interface. But importantly we also want to be able to take control over any player remotely to simplify and fasten our development and creative process.
Indeed, once you start working with multiple physical devices (smartphones, tablets, Raspberry Pi, etc.), being able to control each of them from a single central point can save you a lot of testing time. Time that will be better used to make your application / artwork (or whatever) more interesting.
Defining and creating the states
To that end, we will define and register another shared state description, from which we will create a new state state for each connected players. Let's then create a new src/player-state-description.js file with the following snippet:
// src/player-state-description.js
export default {
  id: {
    type: 'integer',
    default: null,
    nullable: true,
  },
  frequency: {
    type: 'float',
    default: 200,
    min: 50,
    max: 2000,
  },
  synthToggle: {
    type: 'boolean',
    default: false,
    immediate: true,
  },
  synthTrigger: {
    type: 'boolean',
    event: true,
    immediate: true,
  },
};
Then, just as with the global schema, import it and register the share state description in the server's stateManager:
// src/server.js
import globalStateDescription from './global-state-description.js';
import playerStateDescription from './player-state-description.js';

// ...

const server = new Server(config);
configureHttpRouter(server);

server.stateManager.defineClass('global', globalStateDescription);
server.stateManager.defineClass('player', playerStateDescription);
The parameters of the player shared state instances will allow us to implement two different types of synthesizers with very common behavior:
- a first one that is triggered by an event (e.g. playing back a simple sound file)
- a second one that can be started and stopped (e.g. playing a sound file in a loop).
Note that to keep the audio code simple and focus on the architecture and the logic of the application, we will create very simple synthesizers based on oscillators, using the same frequency parameter for the two synths. However, the same general logic would hold for more complex synthesizers with much more parameters.
TIP
Note the immediate attribute for both the synthToggle and synthTrigger parameters which is one of the different modifiers that can be applied to tweak the shared state parameters behavior. In this case immediate means that the value is propagated locally before being propagated on the network to keep the latency and responsiveness of the interface to the minimum.
See SharedStateParameterDescription for more information on the available options.
So let's first create a new player state on each player client. To that end, add the following snippet in src/clients/player.js:
// src/clients/player.js
await client.start();

const global = await client.stateManager.attach('global');
const player = await client.stateManager.create('player', { id: client.id });
The second argument passed to the stateManager.create method allows to define initialization values for the state. Here, we simply pass the client.id generated by soundworks to the state so we can easily track which player shared state is bound to which client.
Creating the graphical user interface
Let's now create a control interface for the player shared states. To that end, we will create a simple Web Component using the Lit library. Creating this abstraction will allow us to simply reuse the component later in the controller interface to remotely take control over any connected player.
Let's then create a new file called sw-player.js in the src/clients/components directory, with the following code:
// src/clients/components/sw-player.js
import { LitElement, html } from 'lit';
import '@ircam/sc-components'

class SwPlayer extends LitElement {
  constructor() {
    super();
    // reference to the `player` state
    this.player = null;
    // to store the delete callback returned by the `state.onUpdate` method
    // https://soundworks.dev/soundworks/SharedState.html#onUpdate
    this.clearOnUpdate = null;
  }

  connectedCallback() {
    super.connectedCallback();
    // update the component when a state change occurs
    this.clearOnUpdate = this.player.onUpdate(() => this.requestUpdate());
  }

  disconnectedCallback() {
    super.disconnectedCallback();
    // stop reacting to state change when the element is removed from the DOM
    this.clearOnUpdate();
  }

  render() {
    // create controls for the player state
    return html`
      <h2>Player [id: ${this.player.get('id')}]</h2>
      <div style="padding-bottom: 4px;">
        <sc-text>Frequency</sc-text>
        <sc-slider
          width="400"
          number-box
          min=${this.player.getDescription('frequency').min}
          max=${this.player.getDescription('frequency').max}
          value=${this.player.get('frequency')}
          @input=${e => this.player.set({ frequency: e.detail.value })}
        ></sc-slider>
      </div>
      <div style="padding-bottom: 4px;">
        <sc-text>Toggle Synth</sc-text>
        <sc-toggle
          ?active=${this.player.get('synthToggle')}
          @change=${e => this.player.set({ synthToggle: e.detail.value })}
        ></sc-toggle>
      </div>
      <div style="padding-bottom: 4px;">
        <sc-text>Trigger Synth</sc-text>
        <sc-bang
          ?active=${this.player.get('synthTrigger')}
          @input=${e => this.player.set({ synthTrigger: e.detail.value })}
        ></sc-bang>
      </div>
    `;
  }
}

// register the component into the custom elements registry
customElements.define('sw-player', SwPlayer);
Once done, we only need to import our new component and insert it into our application template:
// src/clients/player.js
import { html, render } from 'lit';
import './components/sw-player.js';

// ...

function renderApp() {
  render(html`
    <div class="simple-layout">
      <sw-player .player=${player}></sw-player> // [!code ++]

      <h1>Global</h1>
      <p>Master: ${global.get('master')}</p>
      <p>Mute: ${global.get('mute')}</p>

      <sw-credits .infos="${client.config.app}"></sw-credits>
    </div>
  `, $container);
}
TIP
The .player=${player} syntax with the leading . on the HTML attribute is provided by Lit and means that the value is set directly as a Javascript property rather than a HTML attribute (cf. https://lit.dev/docs/components/properties/)
In plain english, this means that it allows us to pass complex Javascript object such as our player shared state, which would not be feasible HTML attributes which are basically only strings.
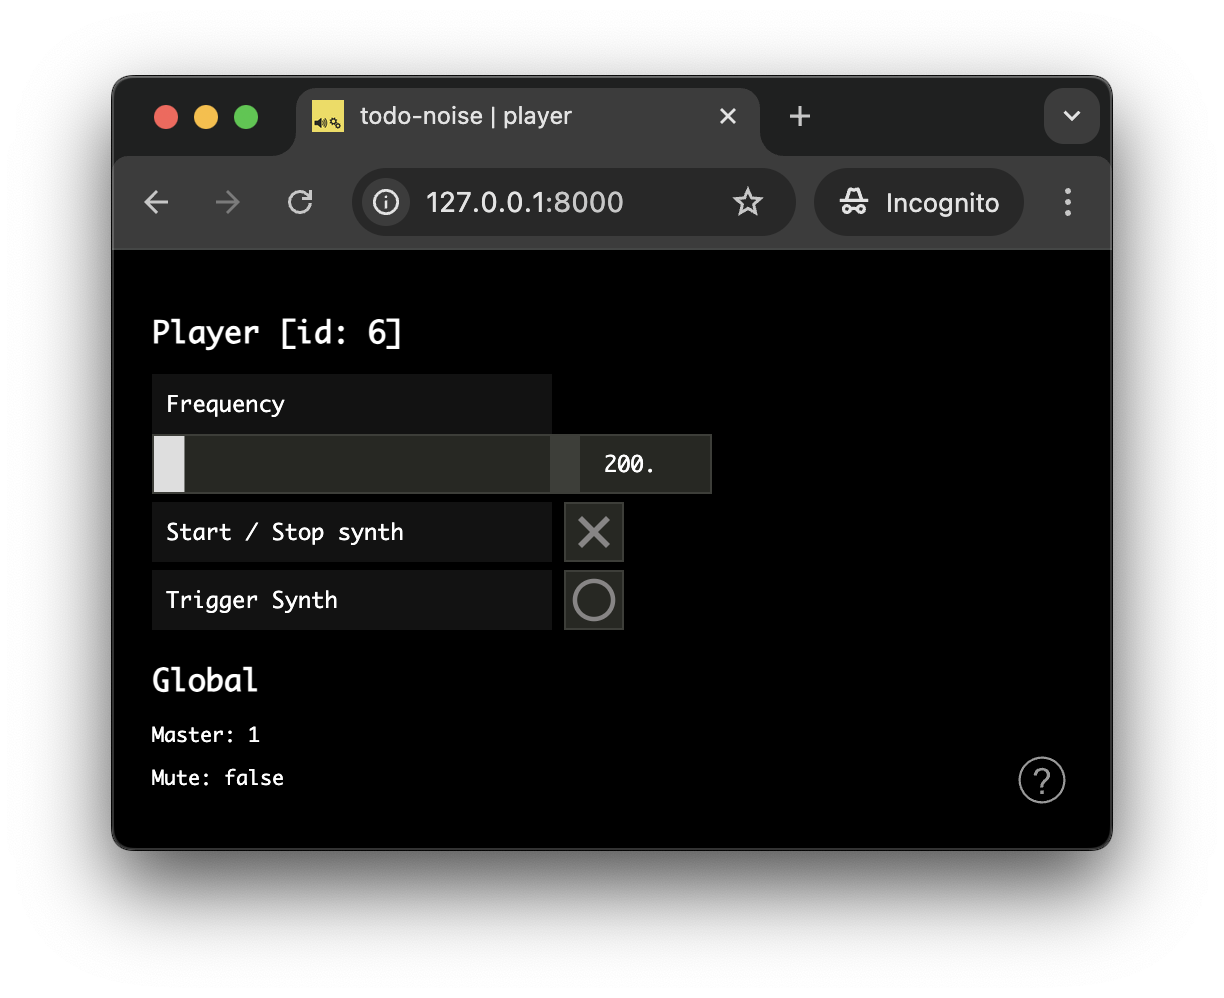
After refreshing the page, your player should now look like the following:
Creating the synthesizers
Everything is now ready to react to both the player and global states changes to play some sounds on our player clients.
Resume the context with the platform-init plugin
First thing first, let's instantiate a new AudioContext:
// src/clients/player.js
async function main($container) {
  const config = loadConfig();
  const client = new Client(config);
  const audioContext = new AudioContext();
  // ...
}
TIP
Note that for emulating a large number of clients in browsers (as they generally limit the possible number of AudioContext in a single Web page), you can simply create the AudioContext outside the main function to share the same context amongst all your clients, e.g.
const audioContext = new AudioContext();

async function main($container) {
  // ...
  const audioContext = new AudioContext();
}
As seen in the platform-init plugin tutorial, our audioContext requires a user gesture to be resumed and be allowed to produce sound. So let's just import and configure it properly (remember that we have already asked the wizard to install it at the beginning of the tutorial).
Let's start with the server side:
// src/server.js
import { Server } from '@soundworks/core/server.js';
import { loadConfig, configureHttpRouter } from '@soundworks/helpers/server.js';
import ServerPluginPlatformInit from '@soundworks/plugin-platform-init/server.js';

// ...

const server = new Server(config);
configureHttpRouter(server);
// define the global shared state class
server.stateManager.defineClass('global', globalStateDescription);
server.stateManager.defineClass('player', playerStateDescription);
// install plugins
server.pluginManager.register('platform-init', ServerPluginPlatformInit);

await server.start();
INFO
If you forgot to install the plugin at the beginning of the tutorial, you can simply run npx soundworks to install it now.
And do the same on the client side, configuring it with our AudioContext instance:
// src/clients/player.js
import { Client } from '@soundworks/core/client.js';
import { loadConfig, launcher } from '@soundworks/helpers/browser.js';
import { html, render } from 'lit';
import ClientPluginPlatformInit from '@soundworks/plugin-platform-init/client.js';
import './components/sw-player.js';

// ...

async function main($container) {
  const config = loadConfig();
  const client = new Client(config);
  const audioContext = new AudioContext();
  // register plugins
  client.pluginManager.register('platform-init', ClientPluginPlatformInit, {
    audioContext,
  });
  // ...
}
Create the "master bus" chain
Let's first create our "master bus" audio chain, which will be controlled by the global state: a GainNode for the master volume parameter, and another one for the mute parameter:
// src/clients/player.js
// master bus chain
const mute = new GainNode(audioContext, { gain: global.get('mute') ? 0 : 1 });
const master = new GainNode(audioContext, { gain: global.get('master') });
// [mute: GainNode] -> [master: GainNode] -> [destination: AudioDestinationNode]
mute.connect(master).connect(audioContext.destination);

// update the view each time the global state is changed
global.onUpdate(() => renderApp(), true);
Then, let's modify our global.onUpdate callback, so that all updates are applied on the audio nodes:
global.onUpdate(() => renderApp(), true);
global.onUpdate(updates => {
  for (let key in updates) {
    const value = updates[key];
    switch (key) {
      case 'master': {
        const now = audioContext.currentTime;
        master.gain.setTargetAtTime(value, now, 0.01);
        break;
      }
      case 'mute': {
        const gain = value ? 0 : 1;
        const now = audioContext.currentTime;
        mute.gain.setTargetAtTime(gain, now, 0.01);
        break;
      }
    }
  }
  // update the view to log current global values
  renderApp();
}, true);
TIP
The AudioParam:setTargetAtTime method is a very useful automation method to control audio parameters in real-time without click and pops.
To test that everything works as expected, let's add a simple oscillator in front of our master chain:
mute.connect(master).connect(audioContext.destination);

const osc = new OscillatorNode(audioContext);
osc.connect(mute);
osc.start();
If you open one or several players, http://127.0.0.1:8000, and a controller, http://127.0.0.1:8000/controller, side by side, you should hear that you can control the general volume and mute all player clients at once!
Once you checked everything works as expected, don't forget to remove this test snippet before going to the next step!
const osc = new OscillatorNode(audioContext);
osc.connect(mute);
osc.start();
Now that all the structure is ready, we can finally implement our two synths.
To keep things simple and focus on the general architecture we will only create simple synths based on oscillators, however keep in mind that the exact same principles and workflow could be used for more complex synthesizers with numerous parameters.
Implement the "trigger" synth
Let's first implement the synth which will produce a short sound when the "Trigger Synth" button is pressed on the player interface. To be able to distinguish it from the other synth we will implement just after, we will use play it at the upper octava, i.e. frequency * 2.
Let's then implement the onUpdate callback of our player shared state that will handle all the audio synthesis:
global.onUpdate(updates => {
  // ...
}, true);

player.onUpdate(updates => {
  for (let key in updates) {
    const value = updates[key];
    switch (key) {
      case 'synthTrigger': {
        // trigger a sound for 1 second at twice the frequency
        const now = audioContext.currentTime;
        const env = new GainNode(audioContext, { gain: 0 });
        env.connect(mute);
        // schedule the automation for our envelop
        env.gain
          .setValueAtTime(0, now)
          .linearRampToValueAtTime(1, now + 0.01)
          .exponentialRampToValueAtTime(0.001, now + 1);
        const osc = new OscillatorNode(audioContext, {
          frequency: player.get('frequency') * 2,
        });
        osc.connect(env);
        osc.start(now);
        osc.stop(now + 1);
        break;
      }
    }
  }
  // update the view to log current global values
  renderApp();
}, true);
TIP
Note that we also call the renderApp function at the end of the player.onUpdate callback. This will help us to keep everything synced later when our controller will be able to take control over a specific player client.
You can try out this new synth by reloading your client and clicking on the "Trigger Synth" bang button. You can also see how the produced sound will react to any change made to the "Frequency" slider.
Implement the "toggle" synth
The second synth, the "toggle" synth, will start and stop when our "Toggle Synth" button switched on and off on our player interface.
Let's just then complement our onUpdate callback to implement this alternative synthesizer:
// this variable holds our current oscillator when it is started
let synthToggle = null;

player.onUpdate(updates => {
    for (let key in updates) {
      const value = updates[key];

      switch (key) {
        case 'synthToggle': {
          // If we have a synth running, let's stop it in all cases.
          // This pattern prevents any possibilities of having two synths running
          // in parallel... in which case one of them would be impossible to stop
          if (synthToggle !== null) {
            synthToggle.stop();
            synthToggle = null;
          }
          // if the value of the `synthToggle` is true, let's start a new synth
          if (value === true) {
            // start the synth
            synthToggle = new OscillatorNode(audioContext, {
              frequency: player.get('frequency'),
            });
            synthToggle.connect(mute);
            synthToggle.start();
          }
          break;
        }
        case 'synthTrigger': {
          // ...
        }
      }
    }
    // ...
  }, true);
}
You can already check that the synth is running when you are clicking the button on and off on the interface.
Let's just add a final touch to make sure our synth react to any change applied to the frequency parameter when it is running:
player.onUpdate(updates => {
    for (let key in updates) {
      const value = updates[key];

      switch (key) {
        case 'synthToggle': {
          // ...
        }
        case 'frequency': {
          // If we have an oscillator started, apply changes made on the frequency parameter
          if (synthToggle !== null) {
            const now = audioContext.currentTime;
            synthToggle.frequency.setTargetAtTime(value, now, 0.02);
          }
          break;
        }
        case 'synthTrigger': {
          // ...
        }
      }
    }
    // ...
  }, true);
}
And that's all! Our players are now fully functional, and their master chain can be controlled remotely from the controllers.
Let's now finish the project by enabling full remote control of any player client from a controller.
Remotely control players from the controller
Let's go back to our controller and to get a list of all connected players. To that end, the soundworks state manager expose a getCollection method which allows to grab a collection of states that mirror all the states currently created on the network according to a given shared state class name.
The returned SharedStateCollection is automatically kept synchronized with the states that are created and deleted on the network and offer several methods to work with the list.
Let's thus create our player shared state collection using the state manager:
// src/controller.js
await client.start();

const global = await client.stateManager.attach('global');
const players = await client.stateManager.getCollection('player');
Finally we just need to import the Web component we created for our player interface, to render it for each player of our collection:
// src/controller.js
import '@ircam/sc-components/sc-text.js';
import '@ircam/sc-components/sc-slider.js';
import '@ircam/sc-components/sc-toggle.js';
import './components/sw-player.js';

// ...
const global = await client.stateManager.attach('global');
const players = await client.stateManager.getCollection('player');

function renderApp() {
  render(html`
    <div class="controller-layout">
      <header>
        // ...
      </header>
      <section>
        <h1>Global</h1>
        // ...
        <h1>Players</h1>
        ${players.map(player => {
          return html`<sw-player .player=${player}></sw-player>`;
        })}
      </section>
    </div>
  `, $container);
}
As a final step, we now need to react to any change made on the collection of player, be it a parameter update but also a new player connecting to the network, or another one disconnecting from the network.
To that end, let's just refresh our interface when any change is made on the shared state collection:
global.onUpdate(() => renderApp(), true);
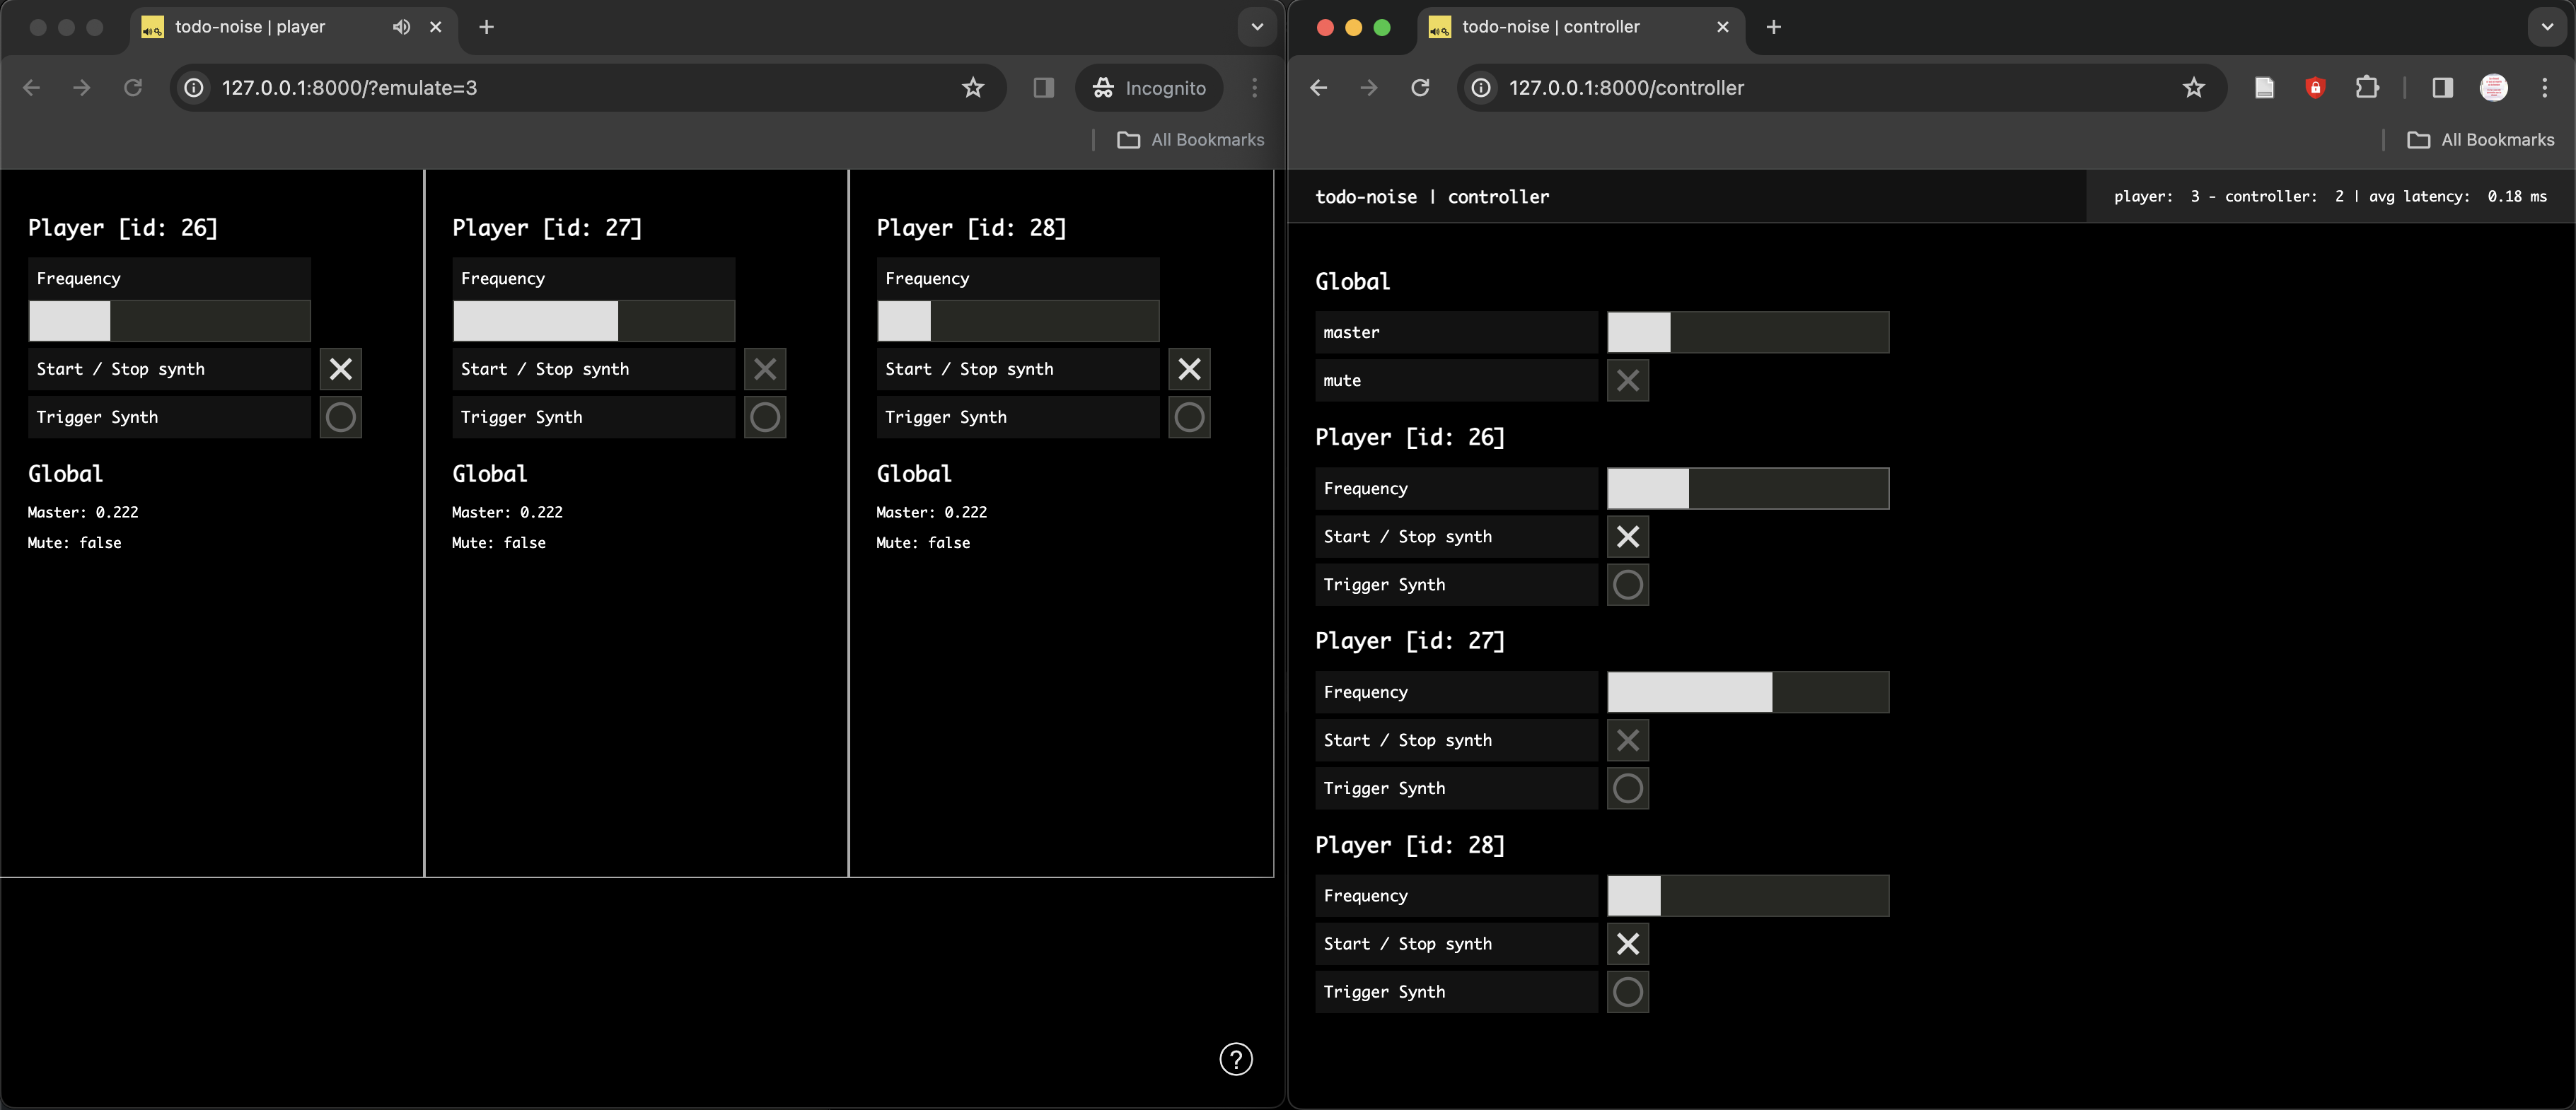
players.onChange(() => renderApp(), true); If you now open a controller (http://127.0.0.1:8000/controller) and emulate several clients in a different window ((http://127.0.0.1:8000?emulate=3), you should now see the full application and how the players and controller are kept synchronized through the shared states. In particular, you can also notice that the players will appear or disappear from the interface when they connect or disconnect:
Conclusion
In this tutorial, you have learned an important pattern that soundworks aims to simplify: the ability to simply create remote control and monitoring of clients through shared state instances. Along the way, you also learned how to create a reusable Web Component using the Lit library.
While the tutorial purposely simplified important aspects of the application to focus on these key points, a number of features could be improved with simple modifications to the structure. For example:
- Improve the start / stop synth so that no click occurs when it is stopped.
- Create more complex synthesizers with more parameters and more complex audio chains.
- Improve the master chain, e.g. use decibels for the master volume to make the slider behavior more natural, add filters and reverbs.
- Refactor the synthesizers with classes to create reusable audio components.
- etc.
In the next tutorial, we will learn another important feature of soundworks, which is the ability to create clients running in Node.js, e.g. to develop IoT applications, using the exact same API.